Testing Rotating and Reciprocating Components in Harsh Environment
In the development of new products, whether the task is R&D, design validation, failure analysis, or durability testing, it is essential to understand key factors such as temperature, strain, and pressure of each key component in the final assembly, operating in its production environment.
Traditionally, few internal measurements were made on reciprocating and rotating components in their development, relying on extensive durability testing on a series of prototype designs leading towards a design that is ready for production. Over the last thirty years, because there is more demand to bring new designs to market in a shorter period, and to reduce the overall development costs, more emphasis is put into initial design utilizing computer modeling. These models require real test data for boundary conditions, and validation.
The transducers designed to measure these parameters are readily available, such as thermocouples, pressure transducers and strain gauges. In the case of rotating and reciprocating components, the challenge becomes finding a wireless technique that is capable of transferring data from these components to a data collection system for further analysis. In 1992, IR Telemetrics, Inc. of Houghton Michigan met that challenge with the invention of their patented Microwave Telemetry Measurement System.
IR Telemetrics Custom Wireless Telemetry System
Due to the complexity of internal machine components and their tight packaging in a final assembly, IR Telemetrics designed a unique measurement system that will fit in small, tight environments, operate under harsh environmental conditions, and be robust enough to endure several hours of testing under a given test/development plan. In addition, the measurement system reliably transmits continuously without noise or intermittent loss of signal, allowing the system to measure high frequency dynamic events such as pressure fluctuations or vibration characteristics.
Design challenges include fitting and attaching wireless measurement components on the part, installing the transducers in complex locations, and wiring the components together to complete the measurement system.
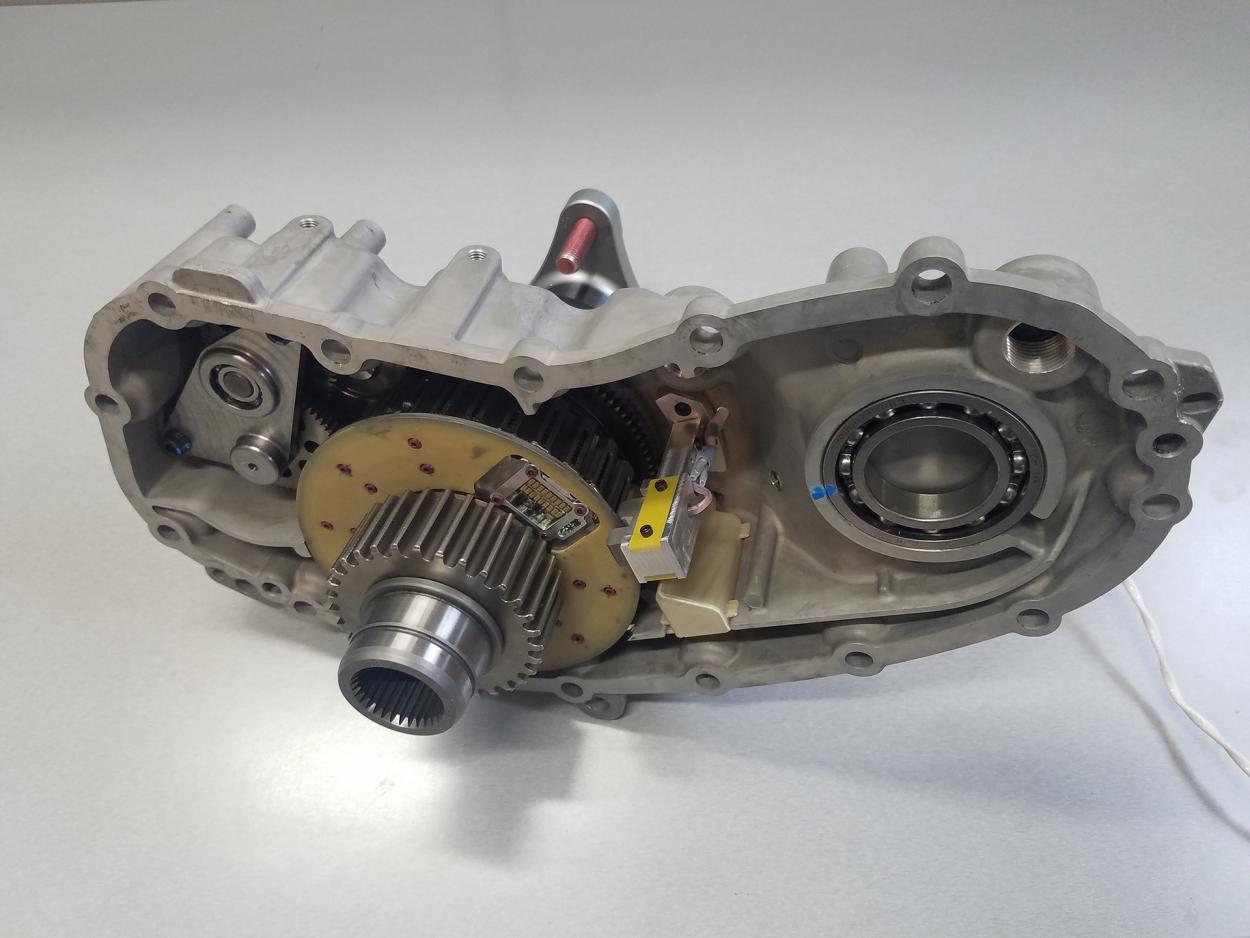
One example is measuring temperatures inside a clutch pack in an automotive transfer case, where IRT installed a 7-channel system measuring the temperature of each of the reaction plates with an inductively-powered microwave transmitter.
The stationary components of the measurement system, which transmit power to the moving instrumented part and receive data transmitted from it, must also be designed to fit in the assembly and remain securely attached in place.
Further considerations include what modifications can be made to the part being instrumented without changing its functionality, operating characteristics, and structural integrity. Mounting a telemetry system on a piston running at high speeds and loads is a good example. In both the manufacturing of custom electronics, and the component modifications required to mount them, precision machining equipment and processes must also be implemented do to very tight tolerances. IR Telemetrics does all the design, engineering analysis, and machining in house to accomplish this.
Whatever the measurement challenge may be, utilizing a custom design approach, IRT can design a Telemetry Measurement System for most any internal machinery component operating in constrained, harsh environments. This includes crankshafts, camshafts, connecting rods and gears in an internal combustion engine, and even small components like intake and exhaust valves, which both rotate and reciprocate.
Contact IR Telemetrics to discuss your telemetry measurement system needs!